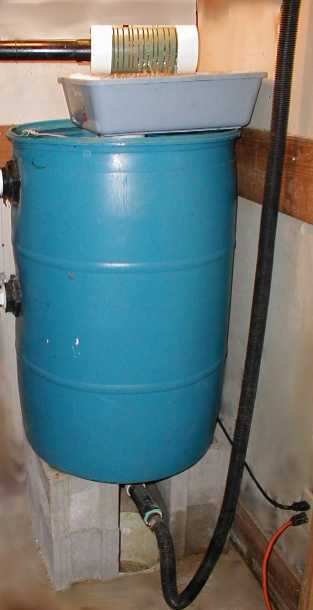
How to build an above ground filter using a 55 gallon barrel.
Note: My methods of filter construction have been improved since this filter was built. I eventually removed this filter, and used this design instead. Please review newer consultation projects to make sure you see the latest and greatest ideas.
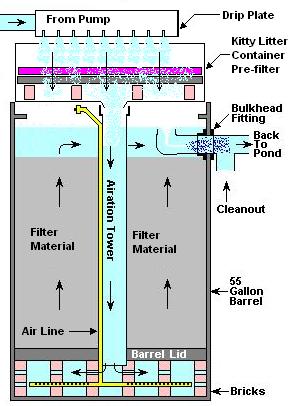
Barrel filters are an inexpensive way to provide filtration for a small to medium sized pond. Designed for a flow rate of around 1200 gph, they can hold around 3 cubic feet of media. One of the nice features of this design is that I use "whirlpool action" to inject air to the bottom of the filter and on the return to the pond. Another nice design element in this filter is the air backwash system which allows you to clean the filter media without removing it. The pre-filter is made of 12x12 squares of quilt-batting. These can be rinsed and resused a couple times, or simply thrown away. A 48x60 peice of quilt-batting ($5) will make twenty 12x12 filter pads. It is also possible to build a barrel filter and attach it directly to rubber liner using my Pipe Boot method.
Design
Materials
| Item | Qty | Description | Size | Cost |
|---|---|---|---|---|
| A | 1 | Barrel | 55 gallon | $5 |
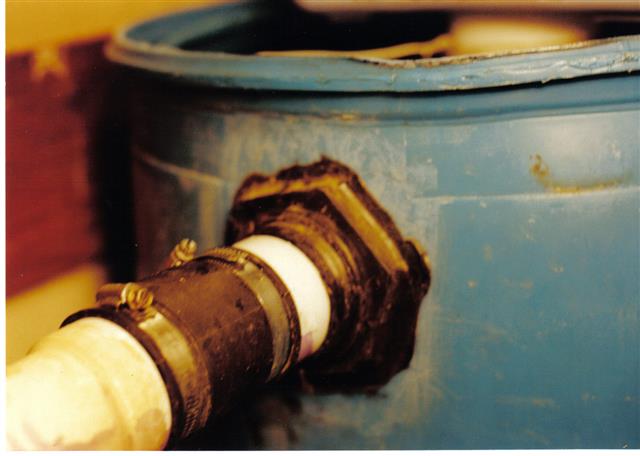
| B | 1 | Bulkhead Fitting | 2" | $8 |
| C | 1 | PVC Pipe | 2" Sewar, Schedule 40, 5' length | $2 |
| D | 1 | PVC Pipe | 1/2" Schedule 40, 5' length | $1 |
| E | 2 | PVC Cap | 1/2" Schedule 40 | $.50 |
| F | 2 | PVC Tee | 1/2" Schedule 40 | $.50 |
| G | 8 | Bricks | 4" x 8" with holes | $2 |
| H | 1 | Wire | 12 gauge, 10' long | $1 |
| I | 1 | Filter Media | 3 cubic feet | $15 |
| J | 1 | Kitty litter container | Around 14"x16" | $5 |
| Total | $40 | |||
Assembly (about 2 hours)
-
Preparing The Barrel
- Cut the top out of the barrel (item A). Do this very carefully, cutting as close to the edge as you can because we will be using the lid later.
- Cut a hole in the side of the barrel (as close to the rim as you can, but low enough that the barrel wall is of uniform thickness). This hole should be the same as the outside diameter of the bulkhead fitting (item B).
- Heat the plastic around the hole (from previous step) with a small propane torch until the platic becomes flexible.
- Slide the bulkhead fitting (item B) through the warm hole and tighen it down until you have
a snug fit.
The Air Pipe - Cut a piece of 1/2" pipe (item D) the same length as the barrel.
- Cut two pieces of 1/2" pipe (item D) each 8" long.
- Drill 1/4" holes every half-inch along a straight line on each 8" pipe.
- Glue the two 8" pipes together with the PVC tee (item F)
- Glue a PVC cap (item E) on one end of each 8" pipe
- Glue the long 1/2" pipe and insert into the center of the PVC tee. The whole thing should look like the letter "T".
- Place the air pipe in the bottom of the barrel.
The Bottom Support - Using the lid (from step 1). Cut a hole in the center of the lid, the same diameter as the sewer pipe (item C).
- Drill 1/4" holes in the lid, (as many as possible).
- Place the bricks (item G) inside the barrel. Place them on edge, in an octogon pattern so that the brick starts at the outside edge of the barrel and points towards the center.
- Place the barrel lid inside the barrel all the way to the bottom so that it is supported by the bricks.
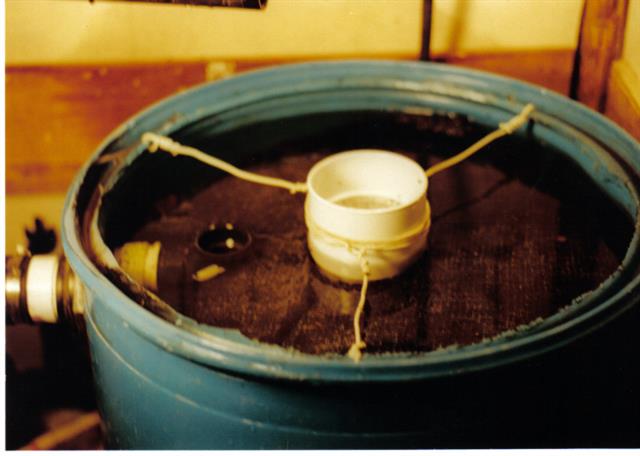
The Aeration Tower - Cut a piece of PVC pipe (item C) the same length as the barrel. This pipe is the aeration tower.
- Place the aeration tower in the barrel inside the hole in the barrel lid.
- Drill three 1/8" holes in the top rim of the barrel. These holes should be positioned at at the 1,5 and 9 positions (as on a clock).
- Cut three peices of wire (item H).
- Anchor each piece of wire in one of the holes.
- Wrap the free ends of the wire around the aeration tower so as to secure it in the middle of the barrel.
- Place the filter material in the barrel.
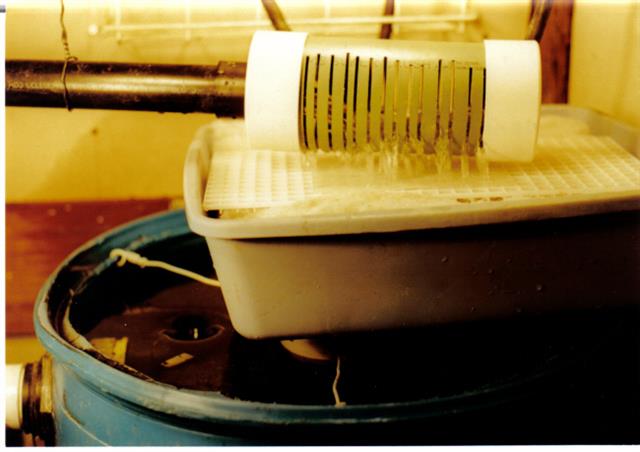
The Prefilter - Cut a 1" hole in the kitty litter container.
- Use a heat gun or heat from an oven burner or propane torch to soften the platic around this hole.
- Using any round container 3" in diameter, stretch the opening of the hole to accomodate the container. The lip should be pointing down. When the kitty litter container is sitting overtop of the barrel, this will direct the water down the aeration tower.
- Place the kitty litter container on top of the barrel.
- Place a chunk of egg-crate grating inside the container, support it off the bottom by about 1" using bricks or rocks.
- Use squares of quilt batting as pre-filter materials.
The Output flow pipes
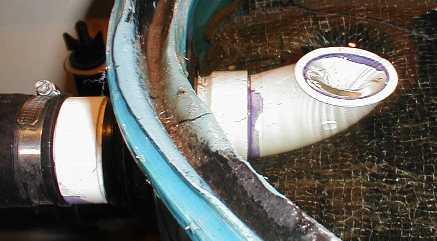
- Inside the filter, connect a 90 degree elbow to the bulkhead fitting. As water enters this elbow to leave the filter it will create a whirlpool which will draw air down with the water. This will supply air with the water in the same manner that a venturi fitting would.
- Immediately after the filter you should install a the 2" Tee.
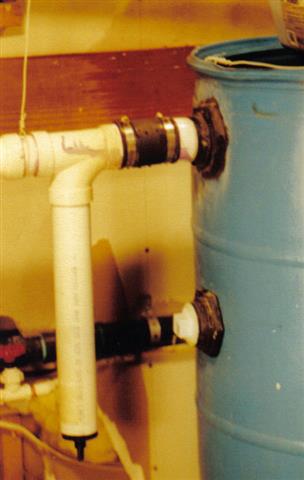
- Attach pipe as needed to connect this line to your waterfall or back to your pond.
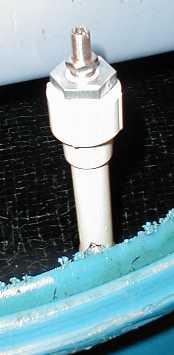
- Attach pipe to the other opening to a draining area and cap it off with a valve.
To Clean the Filter (as needed)
- Leave your pump running !!!
- Connect a small air compressor, or air tank to the air line and release a large volume of air into the filter. This is what we call an "Air-Backwash". The air will shake loose the gunk as it rushes to the top of the filter.
- Open the drain line. Dirty water will start exiting the line.
- When the draining water becomes clear, close the line back off.