Greg Bickal's DIY Series: Buiding a Venturi
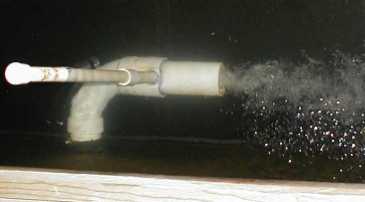
A venturi is used to increase the amount of oxygen going into your water. This
is done by attaching a special fitting to the output side of your pump. The flow of water
through the venturi creates a vacuum which draws air down through a special pipe and mixes it with the water. This venturi
must be used with a pump that delivers a minimum of 2400gph.
Design
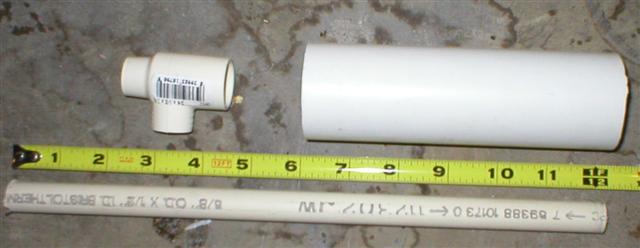
Materials
| Item |
Qty |
Description |
Size |
| A |
1 |
PVC Pipe |
1 1/2", 6" length |
| B |
1 |
CPVC Reducing Tee |
3/4" x 1/2" x 1/2" |
| C |
1 |
CPVC Pipe |
1/2", 5" length |
 |
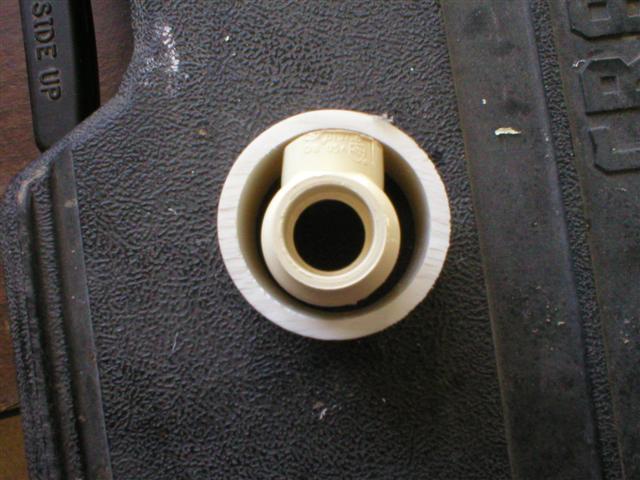
- Grind down the CPVC reducing Tee (item B) so that it fits inside the 1 1/2" PVC pipe (item A).
Make sure you leave enough of the joint to attach the other pipe.
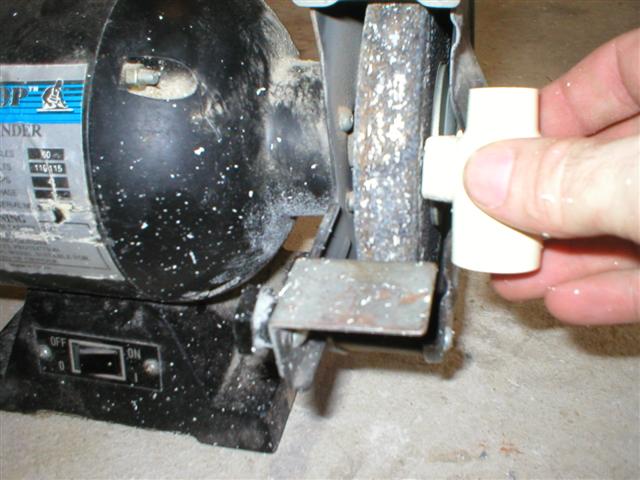
- You should have space all around the Tee.
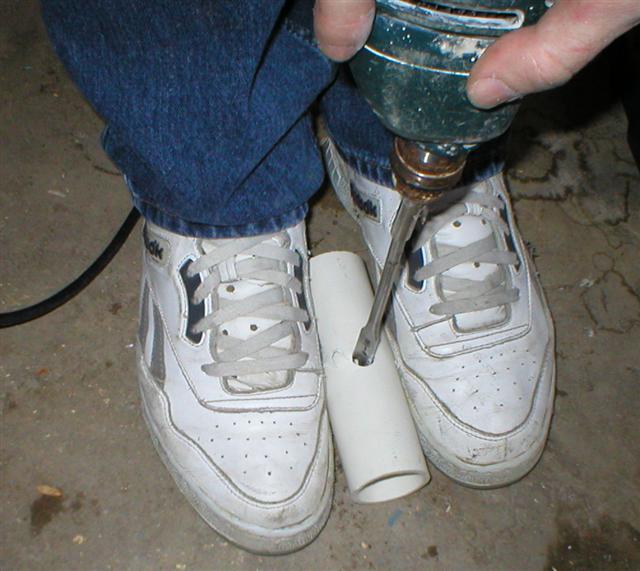
- Drill a 1/2" hole in the center of the 1 1/2" PVC pipe (item A).
- Insert a scrap peice of 1/2" pipe into the end of the Tee. This will be used to help maneuver it into place.
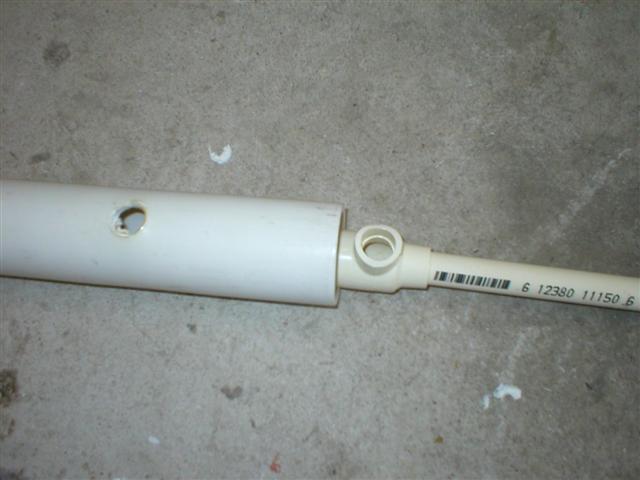
- Apply primer to the top end of the Tee and to one end of the 1/2" pipe.
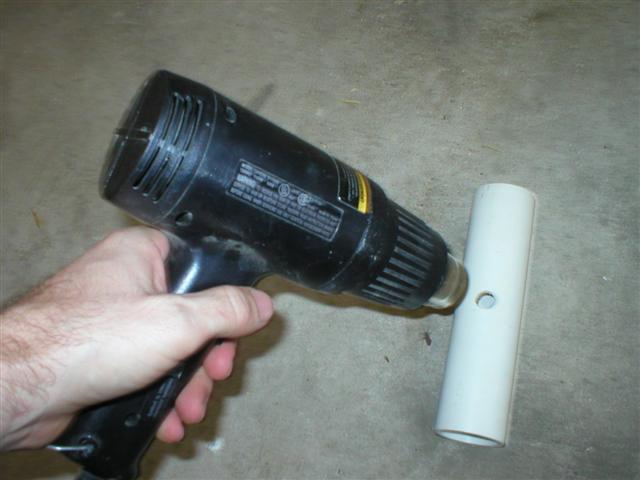
- Heat up the section of the pipe with the hole using a heat gun, stove or propane torch (if using a gas stove or a propane torch, be sure to hold far enough away so as not to scortch the PVC).
- Apply glue to the top end of the Tee and to one end of the 1/2" pipe.
- Insert the 1/2" CPVC pipe (the end with the glue) (item C) into the hole. Stretching the hole to accept the CPVC pipe.
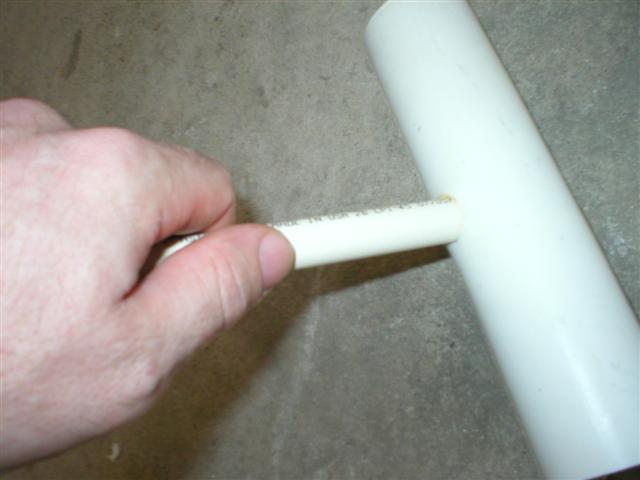
- Allow to sufficient time to cool, and for the glue to cure.
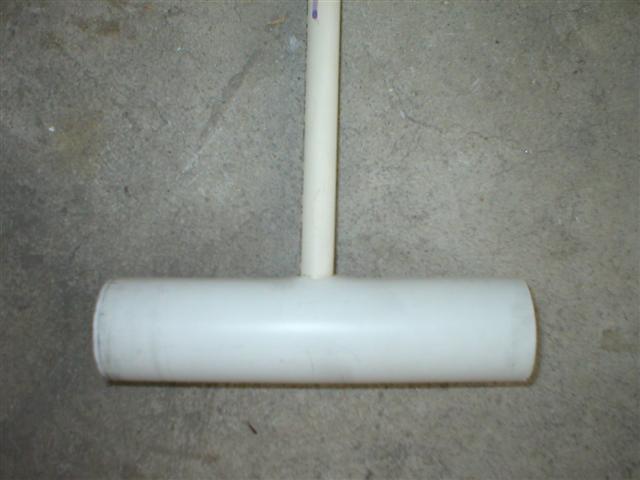
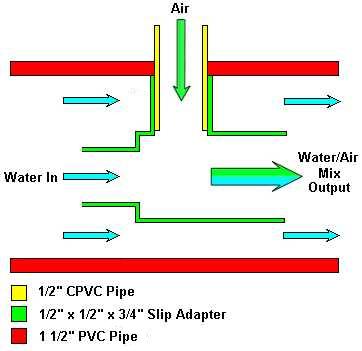
- Connect the 1 1/2" PVC pipe to the output flow of your pump. Follow the diagram above to make sure you
have the flow direction correct.
© Copyright 2004 Greg S. Bickal. All Rights Reserved.