Greg Bickal's DIY Series: Buiding a Bridge
In this segment I will show you how to build an Arched bridge that will span 8'. This particular bridge is 4' wide in order to accommodate a 42" lawn tractor. The width of your bridge can vary. Additional amenities can also be added to your bridge to give it that Japanese look. This bridge will have an arch of about 4". If you would like a higher arch use 2x12 lumbar for the ribs. Make sure you pre-drill all screw holes. Approximate time to build this bridge is 6 hours.

Materials
In this segment I will show you how to build an Arched bridge that will span 8'. This particular bridge is 4' wide in order to accommodate a 42" lawn tractor. The width of your bridge can vary. Additional amenities can also be added to your bridge to give it that Japanese look. This bridge will have an arch of about 4". If you would like a higher arch use 2x12 lumbar for the ribs. Make sure you pre-drill all screw holes. Approximate time to build this bridge is 6 hours.
Materials
| Item | Qty | Description | Size |
|---|---|---|---|
| A | 4 | Lumber | 2x10, 8' length |
| B | 3 | Lumber | 2x6, 8' length |
| C | 1 | Lumber | 2x4, 8' length |
| D | 9 | Deck Boards | 8' length |
| E | 1 | Screws | 3" long (5 lbs) |
- Nail two nails into the wood as shown. The first nail should be 3 3/4" from the bottom of the board. This
measurement can be changed based on your desired approach height for the bridge. Repeat on opposite end.

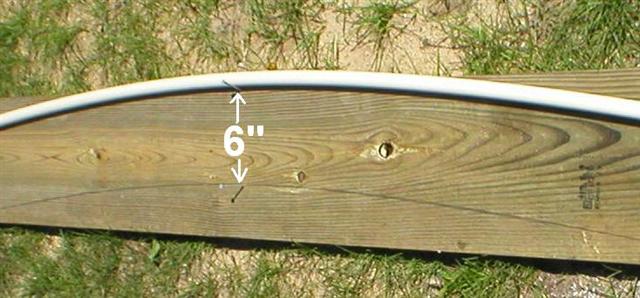
- Nail two nails into the exact center of the board as shown. The first nail should be 6" from the top.
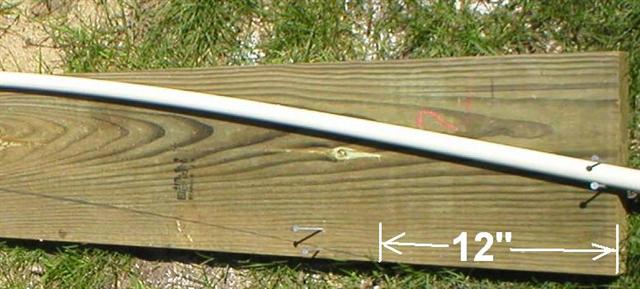
- Make a mark 12" from the end of the board. Then using the pipe as a guide, nail the nails in so that the pipe is
positioned to rest at the end of the 12" mark (as shown in the pre-drawn line. Repeat for opposite end.
- Trace the top of the arch with a pencil. Then repeat and trace the bottom of the arch.

- Use a jig saw to cut out the arch.
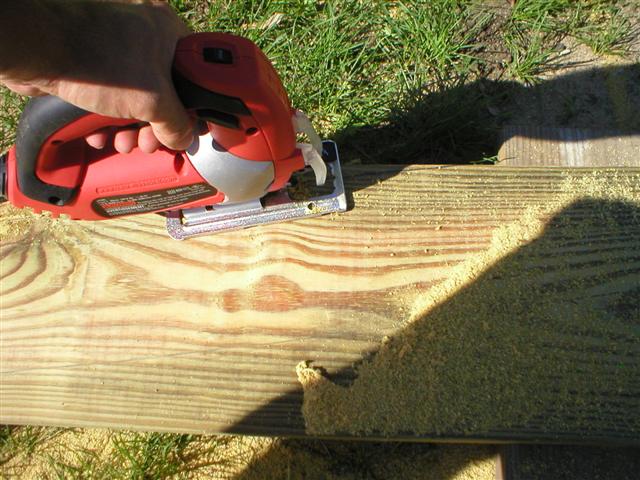
- Using the first arch as a guide, mark and cut the rest of the arches.

- Cut out a notch at each end of the board. The notch should be 5 1/2" wide by 1" 1/2" tall.

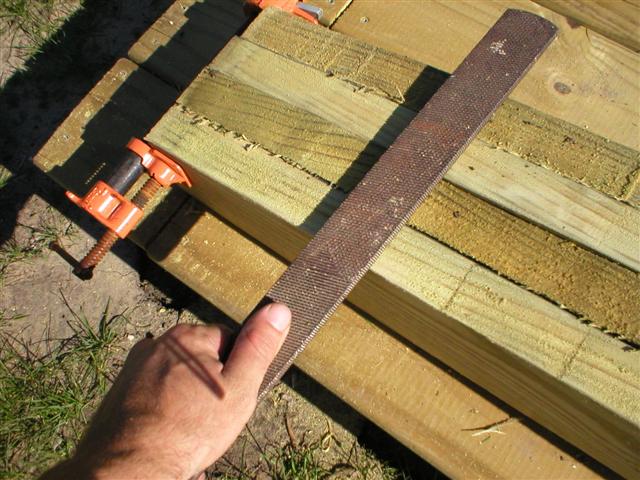
- Clamp all of the arches together. Use a heavy rasp to file down any high spots.
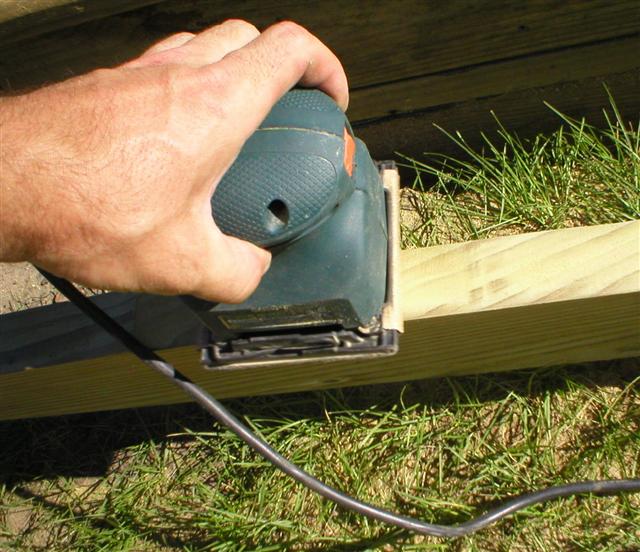
- Use a palm sander to sand down the top and bottom side of the arch.
- Cut two 2x6 boards 4" shorter than the width of your bridge. In this case I used a board 44" long. Mount it to the underside
of the ribs as shown. Repeat on opposite end.
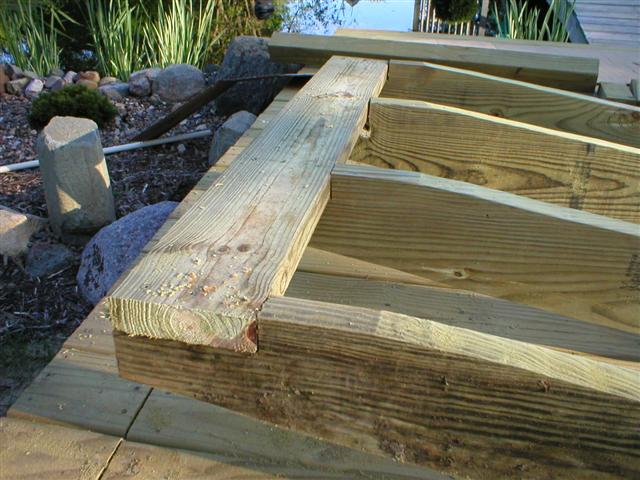
- Cut two 2x4 boards the same length as the previous step. Attach to the end of each side of the ribs.

- Cut nine 2x6 boards to use as spacers. Line them up as shown at the center, and 2' away from center. Use the toenail
method to attach the screws into the ribs. This way no screws will be visible from the outside.

- Set the bridge into place.

- Cut the deck boards to fit. They should be 4" wider than the bridge (in this case 48"). They will overhang the bridge
on each side by 2". Screw into place.

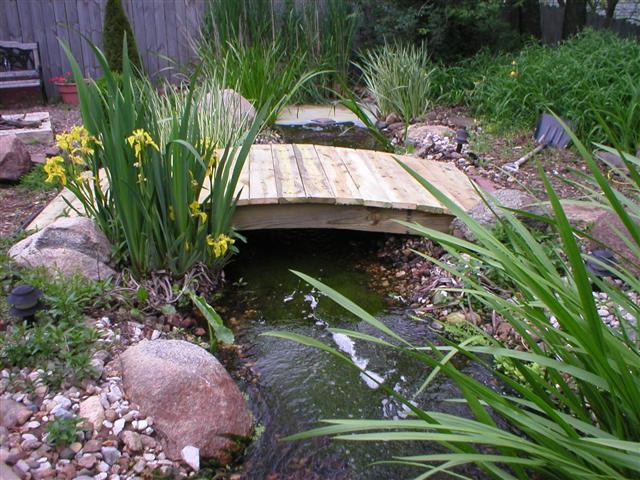
- The finished bridge.
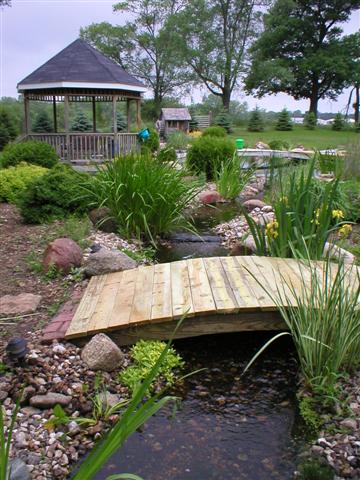
- Another angle.
- Another bridge showing some additional detailing.
